Beaux R'eves

Sunday, September 30, 2012

My New Doughbowl~Estate Sale Style

OK Everyone, I know I must be the LAST person in Blogland to own a Doughbowl!  
Trust me I've been dreaming of owning my own
doughbowl for quite some time.  
I've even decorated it in my mind for every season. 
 (Hey, I redecorate every room I enter in my mind and I KNOW that you do it too!) 
 I have passed them up a few times just because I have a hard time spending over $100 for an old piece of wood. 
 But this week was my Lucky week! 
 I spied on at an Estate Sale that started on Thursday.
It was the first one I hit on my rounds.
There she was waiting in the Basement for me! 
It was $65 and came with the Pinecones.  
Hey, I'll take them!
It was a tad dusty so I polished her up a bit.
Ohhhhhh, Looking pretty!  
I guess if you were going to knead dough in this you should use Mineral Oil or Almond Oil. 
 I am only going to use it for decoration purposes so I used what was handy.
Wouldn't it look wonderful with Hydrangeas 
in the Spring or Summer?
Or, Simple Candles anytime of year?
Or, A Harvest full of gourds and leaves.  
Yep, I thrilled to finally own a Doughbowl!  
And I saved some Dough too!

PS. Come back to see what else I scored this week!  And, a tour of my Fall Kitchen and Hearth Room.  

Until Next Time,
Beaux R'eves
XO Cindy 


Sharing at:
 Southern Hospitality: Thrifty Treasures 

 Susan at Between Naps on the Porch for Metamorphosis Monday
 Marty at A Stroll Thru Life for Tabletop Tuesday

 Coastal Charm for  Nifty Thrifty Tuesday
Kristin at My Uncommon Slice of Suburbia for Tuesday's Treasures
  Kim at SavvySouthern Style for Wow Us Wednesdays 
 Judy at DIY by Design

Friday, September 28, 2012

One Thing Leads to Another

This is supposed to be a post about some pretty pillows that I made for the Kitchen/Hearth Room 
but it's really much more than that!  
It's also a post about how whenever I start on a project it ends up being a MUCH bigger project than I anticipated! 
 How does that happen?  
I just wanted to show you my PILLOWS!!!  
I made the pillows last weekend and I was all ready to blog about them.  In the back of my mind I knew that I wanted to finish my Fall decor in that room.  I honestly must have caught some kind of bug or something because I had NO energy all week (and a bad tummy). 
 I am still working on my remodel project for my clients so
 I have been busy with that too. 
 So I set out to at least take some photos 
of the pretty pillows on the sofa.  
I looked at the photos and thought "Sheesh" 
my sofa looks wrinkly! 
 I wish I could have used the Pic-Monkey wrinkle remover
 (Oh yes! I HAVE used that wonderful feature) 
on my sofa!  
SOooooooooo, long story short- 
This is a post about my pretty pillows on my FLUFFED up sofa without showing you the rest of the room because I'm wiped out!!!  

Here we go!
 These are my old pillows- 
Underneath the Hound Dog that belongs to my son. 
 We watch him every day when my son goes to work.  He works nights so it's not like he can take him to Doggie Day Care.  Besides, he's one of the pack.
 Miss Beaux scoots the ottoman up to the sofa to make a large Lounging space. 
 Hey, we LIVE here!  
They had squished the life out of these pillows.
 I found this fabric at the same Great Estate Sale where I found my wonderful drapes.  She had already cut the fabric for pillow and had the trim all ready to go.  I felt like I had to buy the pieces and finish it for her.  And, it was only two dollars for the fabric and two dollars for the trim!
I pinned the trim to the right side of the fabric and taped down the fringe so that when I did the sewing it wouldn't catch.  I should have used masking tape but it was too far to go into the garage so I grabbed the scotch tape in the kitchen drawer.  I sewed the right sides together and stuffed the old down insert inside.  These pillows are slightly smaller than my old pillows.
Pretty pillow Number One.  Don't you love this fringe? 
I glued the fringe onto pillow Number Two.  I just used Tacky Glue and left it overnight.  It was easier to glue it and I'm not a professional so I didn't want to mess up the pretty pillows with my inferior skills.
So here's what happened when I went to take pictures.
  I SEE THIS!   
Well, that's what you get when EVERYONE wants to hang out in the Kitchen/Hearth room. We have a wonderful sofa in the basement that no one ever uses!  I have had this C.R. Laine sofa for three years.  When I ordered it I made sure that I upgraded to the best cushions that they had.  But, I have family members who are Ex Football players.  They sit hard!  So I'm gonna fix it since I can't seem to keep them off of my sofa. 
I went down to JoAnn's and bought some Batting.  It was 40% off.  I get so lucky sometimes.  Plus I had a 20% off coupon that I had them scan on my phone.  I love technology when I leave stuff at home.
 I wrapped the batting around the cushion and stuffed it back into the cover.  It was that easy!
Wrinkle Free!  Now let's see those Pretty Pillows!
Much Better!  I must have tried a million pillow combinations before I found this pillow at an Estate Sale today for $6.00.  Wait til you see what else I found Estate Sale-ing this week.  I shared it on Facebook so some of you might know already.

Until Next Time
Beaux R'eves
XO Cindy
Sharing at: 
Susan at Between Naps on the Porch for Metamorphosis Monday
 Marty at A Stroll Thru Life for Tabletop Tuesday

Jen at Tatertots and Jello for the Weekend Wrap-up Party
Donna at
Funky Junk Interiors for Saturday Nite Special
 Southern Hospitality: Thrifty Treasures 


Tuesday, September 25, 2012

Glam Master Bath Remodel

Whew!  
I can finally show you pictures of the Master Bath Remodel that I recently finished for my clients (and friends).  I went looking back through my pictures to find the "Befores" and WOW!  A lot of life has happened during this remodel!  Anniversaries, New Puppies (my client's), 
Summer vacations...  
It just goes to show you that the world doesn't stop just because you get busier, you just start juggling!  
Let's take a look at the Before, then the During and THEN the Ahhhhh's (I hope!) of the Afters! 
BEFORE
 Here is what the Master Bath looked like when the home was up for sale.  It's a very spacious room measuring about 17' deep by 12' wide.  It has tall ceilings and a skylight.  The main problems for the new homeowners was the short cabinet height, poor lighting, outdated shower and tile.  The previous homeowners had done a lot of remodeling but had yet to tackle the bathroom.  Our plan was to replace the vanities, the vanity tops, add lighting, put in a new tub, re-tile the shower and tub surround, paint and add trim molding, and add new hardware.  We wanted to do all of this while keeping the same footprint of the bathroom.  
Here it is on Moving Day. 
 Miss Beaux's job was take pictures of each room. 
 I ended up with a LOT of selfies!  Teenagers!
My BFF and I spent a day at Barnes and Noble armed with our IPADs and Venti Starbucks and access to all of the shelter mags and books there.  We planned and sketched and made preliminary design decisions.  You can read about that HERE.  Of course things tend to change along the way and that's normal.  
We hired a contractor, selected all of our materials, met with the cabinet company and the project was in full force around the Fourth of July weekend.  
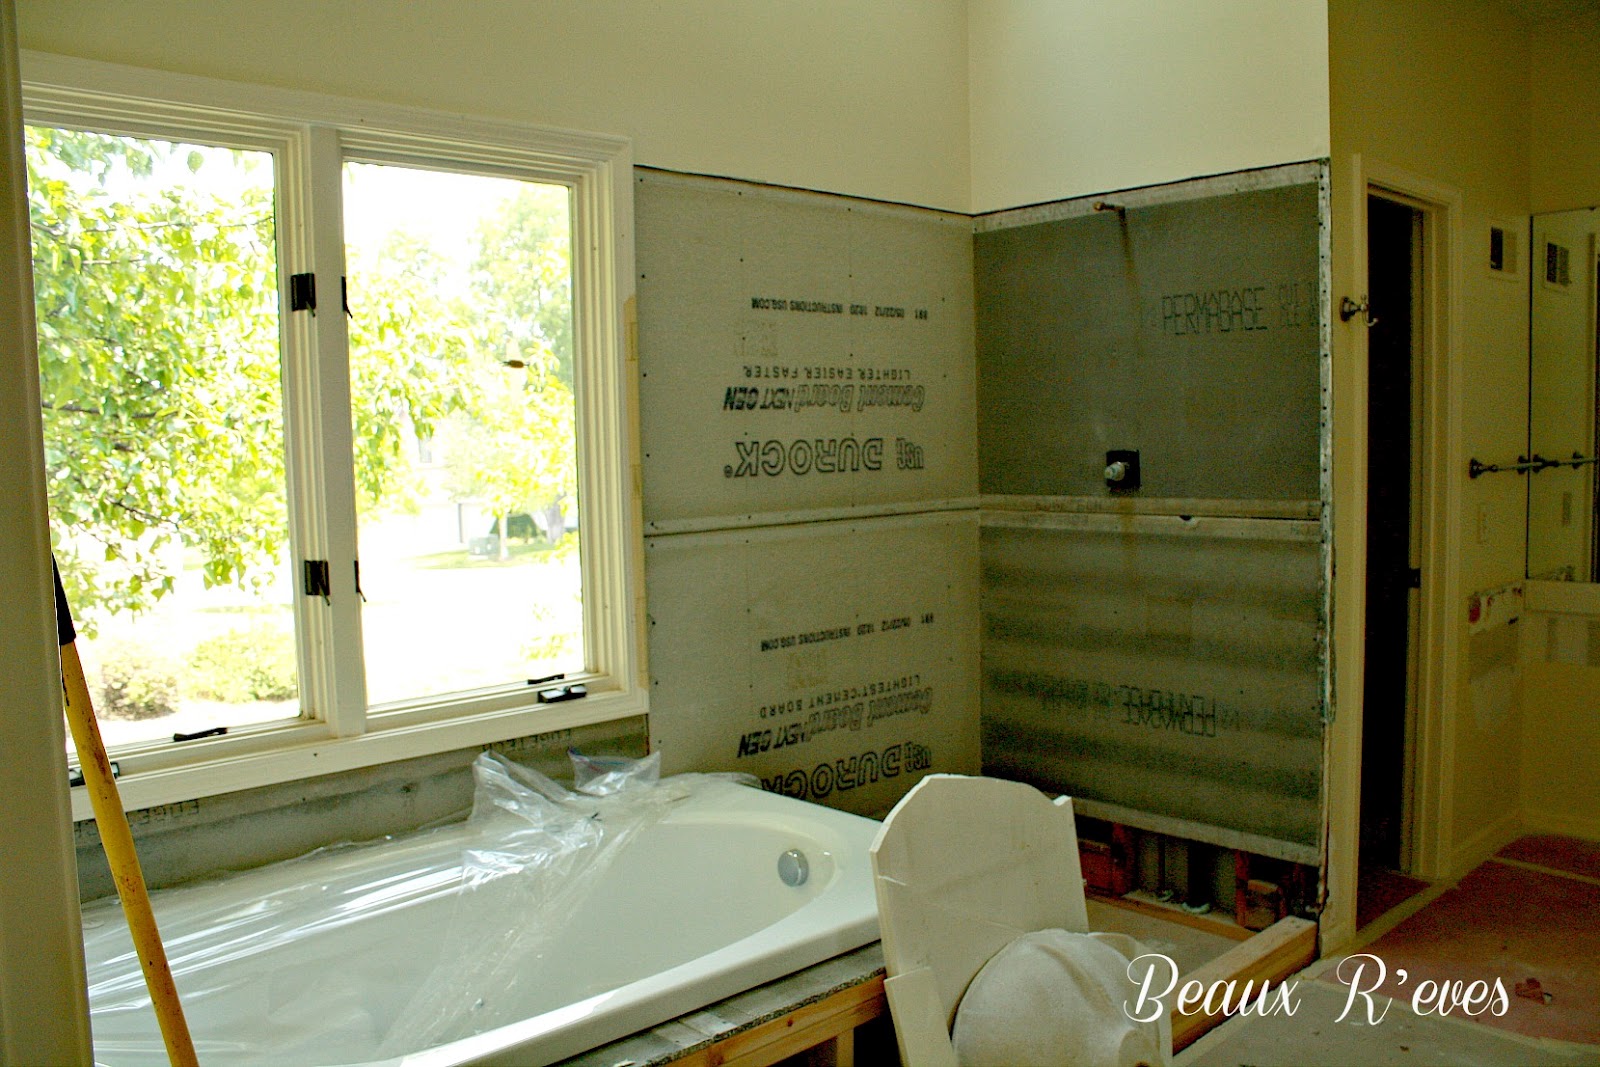
Out with the old shower!  Which turned out to be a good decision!  There was a leak and it was terribly moldy underneath!  ICK!!!  
Teeny cabinets are gone!  Can you believe they were only 32 inches tall?  The floor was protected as we were keeping the existing tile.  
A new tub was installed along with the His and Hers vanities.  And a taller half wall was built between the shower and tub. 
Paint colors: Walls~ Sherwin Williams Patience 7555 (flat)
Cabinets and Trim: Benjamin Moore White Dove (enamel)
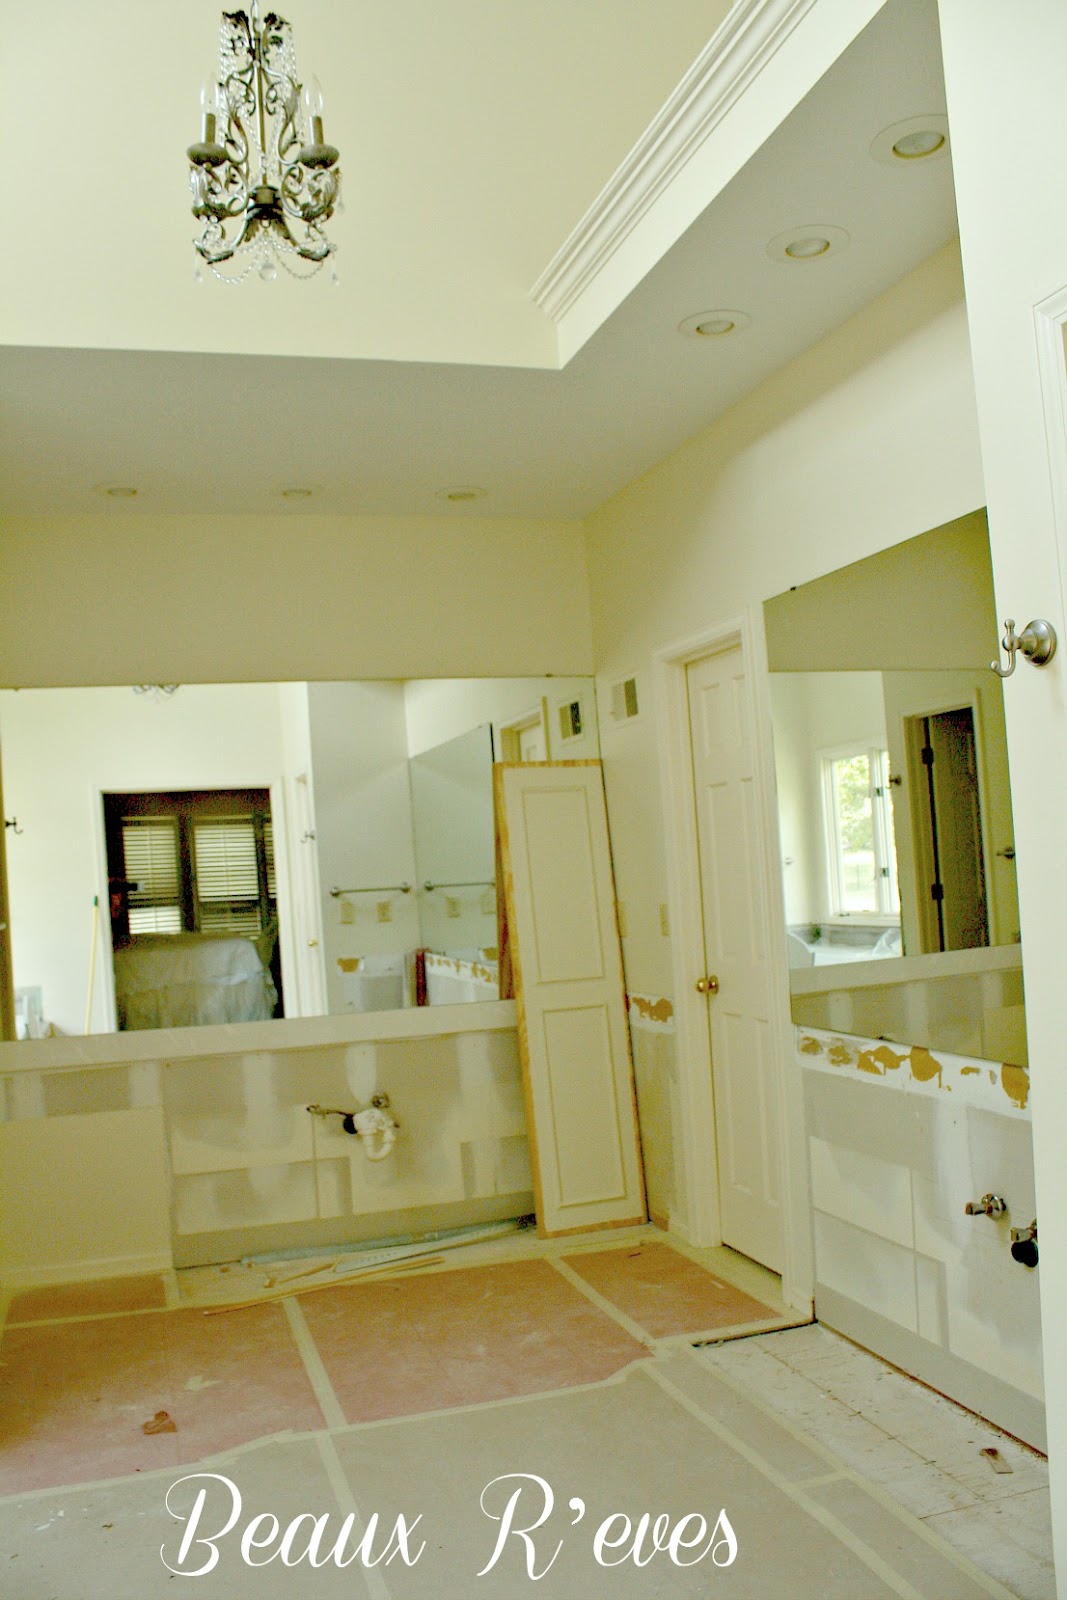
The cabinet company built the vanities and then the construction crew put up the crown molding and  trim before the marble was set.  I drew out the preliminary cabinet design and then some things changed during the process.  We wanted to have a sitdown makeup station but we also wanted the uppers on her side for extra storage.  Storage won out!  The upper cabinet design also changed from being open with mesh or chicken wire to mirrored with the custom mullions that you see in this photo.  That changed our look a little bit to more of a Glam Hollywood look.  
AFTER
 And Finally..... The finished room!!!  
The 3X6 Crema Marfil marble tiles were laid in a staggered brick pattern in the shower and around the tub.  We added trim around the tub for a more beefed up look.  
I love this beautiful glass shower enclosure.  The basketweave on the floor was added as an accent to the shower wall and surrounded with pencil trim.
I love this detail!  Very Spa-like!
On His vanity side we built the lights into the molding.  We added fluting to the sides of the main cabinet and bumped it out a bit for interest.  The great thing about these vanities are the soft glide drawers and cabinets.  When you close them they stop at the very end and softly close themselves! 
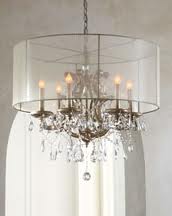
On Her side we placed the sconces directly on the mirror and bumped out the center of the vanity for more counter space.  The old chandelier was too small so we relocated it to another room.  This is the dining room chandy.  We put it here temporarily while we look for a really cool Drum shade chandy. 
Swoon!
Or maybe this one!
How soft and beautiful is this Crema Marfil Marble!  
I just want to hug it!  We kept the faucets as they worked with our design and we saved money there.
And added new hardware in brushed nickel.

We replaced the brass door hardware with  brushed nickel hardware.


How Glam is this shower door handle?  It's the little details that make you the happiest sometimes! 


Before and Afters
There it is!  Master Bath Remodel complete!  We are still working on the basement remodel so stay tuned!  
Until Next Time,
Beaux R'eves
XO Cindy

Susan at Between Naps on the Porch for Metamorphosis Monday
 Marty at A Stroll Thru Life for Tabletop Tuesday
Kim at Savvy Southern Style for Wow Us Wednesdays 
 
Judy at DIY by Design
 Gina at The Shabby Creek Cottage for Transformation Thursdays
 From My Front Porch To Yours for Treasure Hunt Thursday 

Poutpourri Friday at 2805
 Cindy at My Romantic Home for Show and Tell Friday
Courtney at French Country Cottage for Feathered Nest Friday
Heather and Vanessa at At the Picket Fence for Inspiration Friday
Debra at Common Ground for Vintage Inspiration Friday

Sherry at The Charm of Home for Home Sweet Home Friday


Jen at Tatertots and Jello for the Weekend Wrap-up Party
Donna at
Funky Junk Interiors for Saturday Nite Special

 Roeshel  at DIY Showoff
Cedar Hill Ranch for The  Cowgirl Up Party